

This experiment is designed to illustrate how dominant and recessive genes behave in yeast. Two different haploid yeast strains (each of which carries a set of mutant genes) will be mated to produce a diploid yeast strain. The properties (phenotypes) of the haploid and diploid strains will be investigated to determine how the combination of genes determine the properties of the strains.
Genotype Phenotype
Strain 1 MAT a cdc44-1 ade2-1 leu2-3,112 ura3-52 cold-sensitive, red
Strain 2 MAT a his7-1 ura1-1 cdc28-1 temperature sensitive, white
Diploid MATa cdc44-1 ade2-1 leu2-3,112 ura3-52 + + +
MAT a + + + + his7-1 ura1-1 cdc28-1
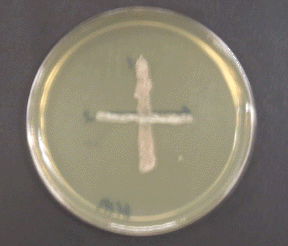 Take a toothpick full of strain 1 and streak a single line across a YPD plate.
Take a toothpick full of strain 2 and streak down across the first line in a ‘cross’ pattern. On the back of the plate (the tops could get switched) write down the directions and identities of the streaks.
Incubate the plate overnight at 28°C.
The next day, replica plate the ‘cross’ to 3 fresh YPD plates. Be sure to copy down the orientation of the streaks on the plates. Incubate 1 plate at 28°C, one plate at 18°C, and one plate at 36°C for 2-3 days.
Observe the growth pattern on the plates. What color are the cultures? Which strains grew on which plates? Are then any white colonies growing on the 36°C plate? If so, take a dab of that colony (it is a diploid from the mating of strains 1 and 2), as well as the original haploid strains, and retest them for growth on YPD plates at 18, 28, and 36°C.
How do the strains genotypes determine their phenotypes? What happens when you combine mutant and wild type (normal) genes in one strain?
Side project:
Take a dab of cells from strains 1 and 2, and put them into 200 ul of water. Incubate for an hour and then look under microscope for ‘shmoos’ and fused (mated) cells. Try the same experiment with two strains of the same mating type (i.e. strains 2 and 3).
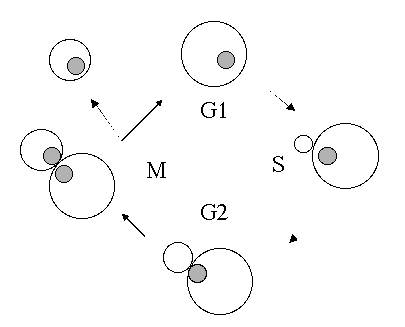
In this experiment, we will look at wild type and mutant cells under the microscope and determine the percentage of cells that are in the various stages of the cell cycle. One of the strains is the same mutant used in experiment 1 (strain 1), and the other is a wild type control strain. Strain 1 is known as a conditional mutant. The cdc44-1 allele encodes for a mutant protein that can function at higher temperatures (i.e. above 28°C), but it does not work in the cold (i.e. below 25°C). The mutant Cdc44-1 protein contains a single amino acid substitution that alters its structure. The resulting protein doesn't function at lower temperatures, preventing the completion of DNA replication. Since the mutant cells cannot complete S phase at the restrictive temperature, they never go through mitosis. They arrest in the cell cycle with a large budded phenotype.
Strain 1 MAT a cdc44-1 ade2-1 leu2-3,112 ura3-52 cold-sensitive (cs-)
Strain 3 MAT a ade2-1 leu2-3,112 ura3-52
Take a toothpick full of cells and add to 5 ml of sterile YPD media. Grow the cells for 4-6 hours at 30°C (or until the YPD solution starts to get visibly cloudy). Take the 5 ml cultures, and split them into two 2.5 ml aliquots. Take one duplicate from each strain and incubate at 30°C, and take the other and incubate at 18°C. After 4 more hours of incubation remove 0.3 mls of cells from each culture and add 0.7 mls of ethanol to stop cell division. Vortex the fixed samples and visualize under a microscope. Score 100 cells from each sample and determine the percentage of cells having the following morphologies (unbudded, small-budded, large budded cells). Don’t count the cells that are clumped together, because it is impossible to tell whether or not they are actually joined or just loosely sticking together.
Morphology (%) unbudded, small budded, large budded, other
Strain 1 30°C
Strain 1 18°C
Strain 3 30°C
Strain 3 18°C
What are the relative proportions of cells having the various morphologies. Did the proportions change at the different temperatures? If a cell cycle normally takes 90 minutes at 28°C, how long do cells spend in G1 phase (i.e. as unbudded cells)?
Strain 3 MAT a ade2-1 leu2-3,112 ura3-52
Strain 4 MAT a leu2-3,112 ura3-52 rad9::LEU2
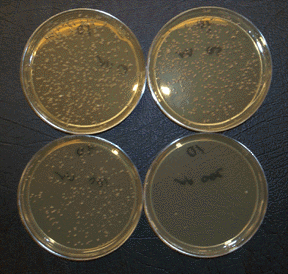
Take a dab of cells from strains 3 and 4 and incubate in 5 ml of YPD for 2 days at 30°C. The culture should become very cloudy, and it will then contain about 1 x 10⁸ cells/ml. In order to use it for this experiment, it will have to be diluted. To do this, remove 0.1 mls of cells from each culture and add to 0.9 mls of sterile water. This sample now contains a 10 x dilution. Mix well and from the 10 x diluted sample, take another 0.1 mls and add another 0.9 mls of sterile water (this is now a 100 x dilution). Repeat two more times until you get a 10,000 x dilution. This 1 ml sample will now have about 1 x 10⁴ cells/ml.Take 0.1 ml aliquots from the diluted samples and spread onto each of 10 labeled YPD plates. Take pairs of plates and subject them to increasing doses of UV irradiation. Be sure to label the bottoms of the plates accordingly as to the strain and dose. One set of plates from each strain will not get irradiated at all and will serve as the control (100% viability). After the irradiation, incubate the plates at 30°C for 4 days. Count the number of colonies per plate, average the duplicates and graph the results (viability vs. UV dose) for the two different strains.
Methods of irradiation:
In this experiment it is important that the strains get a controlled dose of irradiation. If you use a hand-held UV light, attach it to a stand at a given distance (i.e. 8 inches) above the plates. Don’t try and irradiate too many plates at one time, since the plates that are off to the side will not receive as much of a dose as those right below the UV source. Remember to remove the tops of the plates before irradiation. You can vary the dose of irradiation from a hand-held source by increasing the time of exposure (try between 15 and 60 seconds).
It may also be possible to use natural sunlight as a UV source. Try at midday for 3-10 minutes, but be careful of leaving the plates tops off too long, since your plates may get contaminated.
Return to PIMMS workshop Main Page